
Written by Greta Kelly, Conservation Practice MSc Student at Cardiff University.
During my studies on the Conservation Practice MSc at Cardiff University I had the opportunity to do a placement with the natural science conservation department at Museums NI. As part of this I assisted in an ongoing project to conserve and stabilise a number of trophy heads in the museums stores. The trophy head that I worked on was an impala skull, mounted on a wooden shield, dated to the 1930s.
Before beginning any conservation, I carried out a condition assessment of the skull and shield, to determine what treatment would be needed. The skull was generally in good condition, with no identifiable breakages or loss. The teeth while still in their sockets, were loose, and there was slight delamination at the base of the right horn. There was extensive surface dirt on the teeth, horns and skull, including inside the skull.


Before cleaning images of the impala skull. Image credit: Greta Kelly
The wooden shield was in good condition, with just some surface dirt. However the two metal hooks which looped through the zygomatic arches to hold the skull in place, were not providing sufficient support, allowing the skull to move about on the shield and putting it at risk of damage.
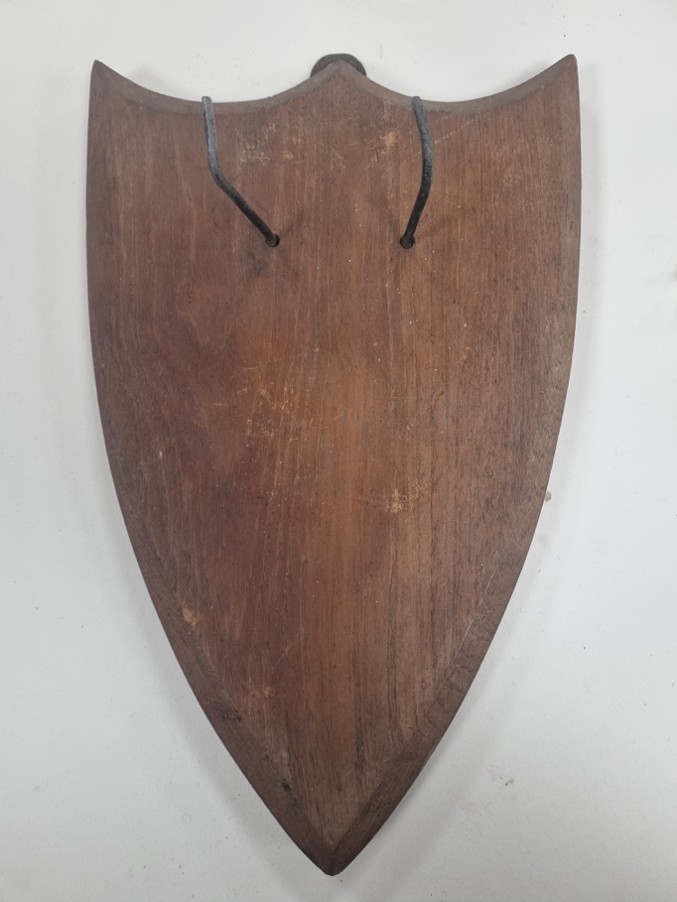
Before treatment image of the shield mount. Image credit: Greta Kelly
Based on the condition assessment the proposed treatment plan was to carry out a surface clean of the skull, teeth and horns. The horns would be given a protective coating, following cleaning, and stabilised with adhesive injected around the base. The teeth would be stabilised with an adhesive to prevent them falling out of their sockets. The shield would be cleaned and given a protective coating. Finally, the skull would be remounted on the shield, using wire to more securely fix it in place.
I began by cleaning the skull and teeth in stages; first dry cleaning with a soft brush to remove any loose dirt, then by gently rolling a smoke sponge over the surface and finally wet cleaning using swabs with a mild detergent, followed by swabbing with a mix of industrial methylated spirits (IMS) and water to remove any residue. The swabbing was done very carefully, to not overclean the bone, which would dry it out and change the appearance. When cleaning the skull I worked on it in sections, doing each bone at a time, which helped keep track of where I had cleaned, and provided a very satisfying before and after.


In progress (left) and after cleaning (right) images of the skull. Image credit: Greta Kelly


Teeth before (left) and after (right) cleaning. Image credit: Greta Kelly
When cleaning the horns I followed the same process as the skull, until I got to the detergent, water and IMS stage, where I ran into some unforeseen problems – the wet cleaning was causing the surface of the horn to dry with a cloudy finish in some areas. On this basis wet cleaning of the horns was abandoned, instead I did another pass with the dry cleaning techniques to remove as much dirt as possible that way. Only a small section of one of the horns was affected, a benefit of working slowly in small sections at a time. Once the horns were cleaned I applied a protective coating of acrylic resin Paraloid-B72, testing a small area first to ensure it didn’t cause the same cloudy effect as the wet cleaning, which it didn’t.
Next I moved on to stabilising at risk areas. I injected Paraloid B-72 around the base of the teeth to act as an adhesive, to secure them and prevent them from falling out in future. There was some vegetation trapped inside the impalas’ teeth, so I applied a thin layer of Paraloid B-72 to the teeth crown to keep this in situ, as it may be of interest for future study.
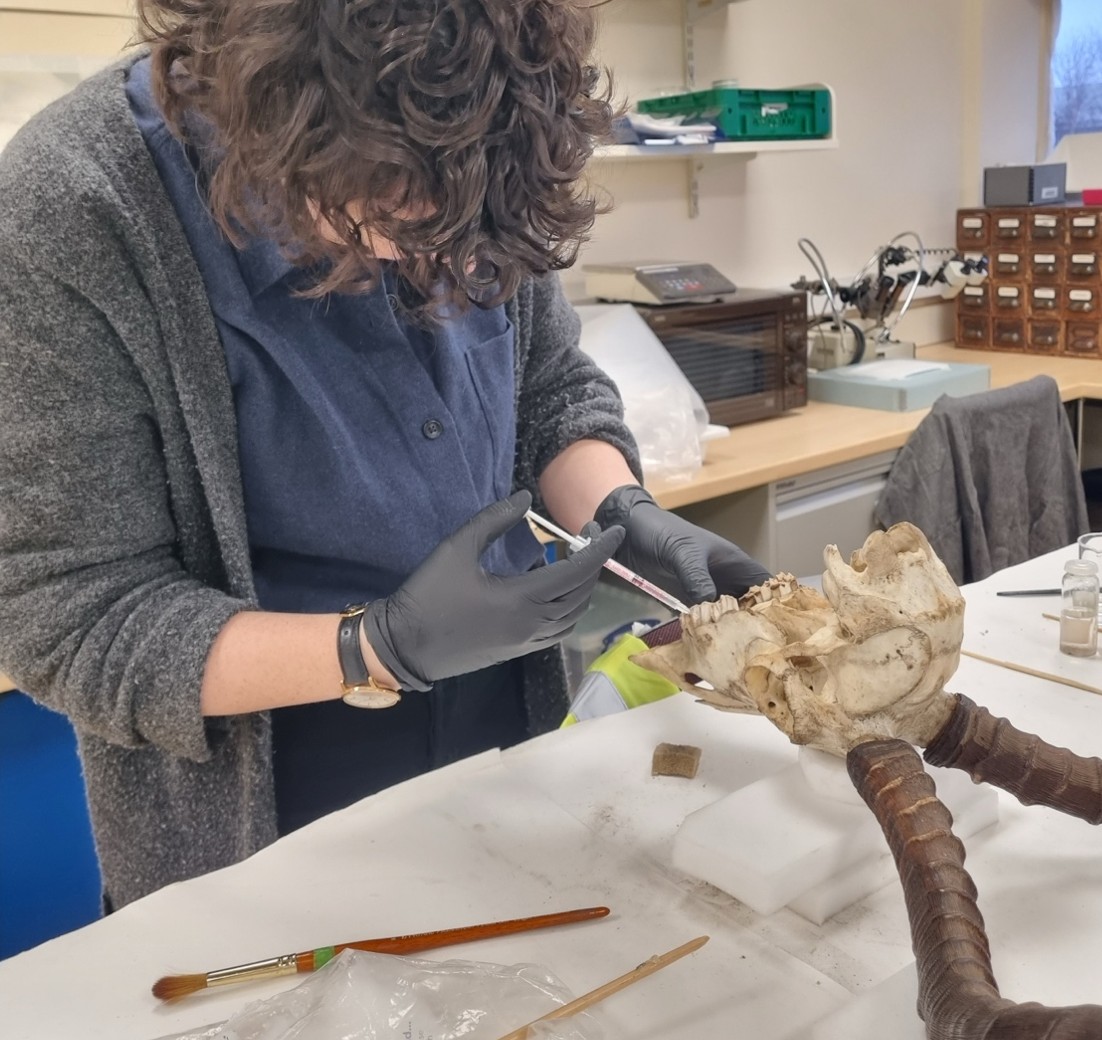
Injecting Paraloid B-72 around the teeth. Image credit: Jen Gossman
I injected adhesive around the base of the horns, where they join the skull. I also applied a layer to exposed cancellous bone, to secure and consolidate it.
With the skull treated I moved on to the shield. I cleaned the wooden surface using swabs and water, and IMS for the metal hooks. Once the shield was clean I applied a layer of Cosmoloid wax to give it a protective coating.
Then it was time to remount the skull onto the shield. To provide additional support I looped wire through the skull, out from underneath the cheekbones on each side, then around the hooks on the shield. Where the wire passed through the skull it was covered in rubber tubing, to prevent it from damaging the bone. I wrapped the tips of the hooks in Tyvek, to help add some cushioning between it and the skull. I also cut out some thin foam strips to place between the skull and the shield where they were touching, to provide some padding and prevent wear. The original labels for the trophy head were placed in a protective plastic sleeve, and reattached. With that conservation work was complete and the trophy head could be returned to the storeroom.


The completed Trophy Head (left) and close up of additional supports (right). Image credit: Greta Kelly
Acknowledgments
I’d like to thank Jen Gossman and Museums NI for this opportunity. This placement provided me with an excellent introduction into the world of natural sciences conservation and I thoroughly enjoyed it!


Pingback: NatSCA Digital Digest – August 2026 | NatSCA