Written by Madalyne Epperson, Assistant Conservator, Milwaukee Public Museum (MPM).
The Milwaukee Public Museum (MPM), located in downtown Milwaukee, is Wisconsin’s natural history museum. It opened to the public in 1884 and houses more than four million objects. The Museum is currently undertaking a multi-year effort to pack its extensive collections and relocate to a newly constructed building, due to open in 2027. I joined the MPM team in September 2025 to prepare roughly two thousand objects for display in the new building, which will be called the Nature & Culture Museum of Wisconsin. One of my first assignments was to stabilize a full body arctic fox and ptarmigan predation mount.

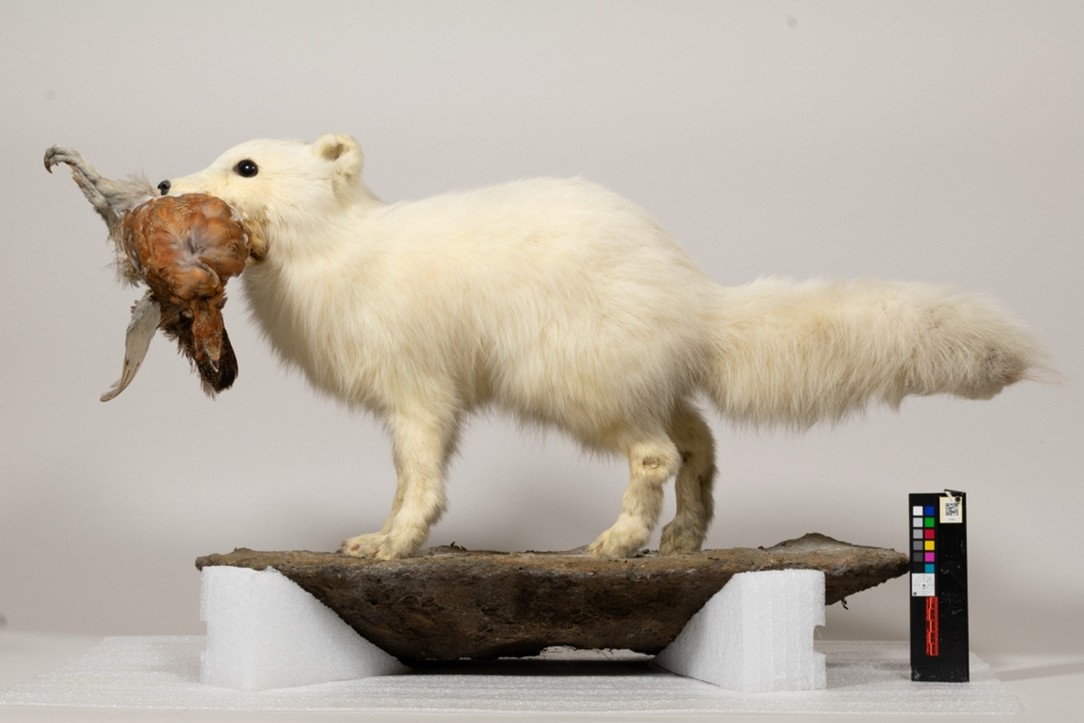
Before Treatment Photo of Arctic Fox (M260); Photo Credit: Greta Grum and Megan Kriefall
While the arctic fox had some minor fur and skin loss on its legs, the most visible concern was the fox’s tail. The distal one-fifth of the tail hung limply, and its iron armature protruded from the fluffy white fur. I initially thought the tip of the tail had simply become detached from the armature. Once I investigated further, however, I realized the tail was never attached to the iron armature. The metal rod simply runs parallel to the leather and bone core of the tail. It is this organic core that had broken. The tip only remained attached to the mount due to the tangled coarse fur surrounding the break.


Break Edges on the Detached Tail Tip (Left) and Mounted Specimen (Right)
After untangling the fur and separating the tail tip from the mounted specimen, I considered my treatment options. The surface area of the break was very small, so I worried that an adhesive repair would not be successful. Additionally, due to the age of the specimen, the leather around the break edges was too thin and delicate to hold stitches. Bone was present in the core of each break edge, as well, so it would have been impossible to insert a wire into the tail to bridge the break that way. I also dismissed the idea of adhering a wire along the exterior of the break to serve as an extension of the original iron armature. I felt that this would not have been easily reversible or visually appealing.
While scrolling through social media, I happened across videos that detailed hair extension application methods. One technique involves sewing extensions into a braid or cornrow. The braided natural hair acts as an anchor point for the extensions and, since the extension is sewn to the hair, it cannot come off without intervention. I believed this concept could be applicable to the treatment of the arctic fox.
Using a needle and nylon thread, I tied bundles of hair together near the break edges to create three anchor points on either side of the join. I positioned the anchor points so they lined up directly across from each other. After aligning the detached tip and mounted tail, I carefully sewed the anchor points together. A curved upholstery needle made this process very simple, even though I couldn’t see much due to the fur. I gently pulled the stitches tight and knotted the thread before carefully brushing the fur to camouflage the repair.


Anchor Points Along the Break Edges
If I were to repeat this technique in the future, I would probably use cotton thread instead of nylon, as it is a natural fibre and would not stretch as much during the stitching. I believe that this treatment was so successful, in part, because the fox’s fur is very dense and coarse. I am unsure if this technique would work as well on an animal with finer hair. Several months later, the repair is still strong and undetectable. This artic fox is now ready to meet his adoring public!
After Treatment Photo of Arctic Fox (M260); Photo Credit: Greta Grum and Megan Kriefall

